How I Refinished Our Dining Table:
The Good, The Bad, The Ugly
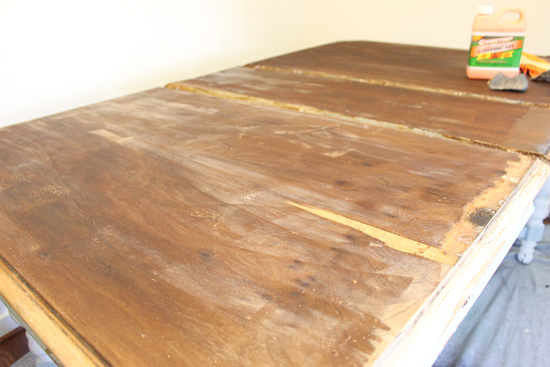
I’ll warn you. This doesn’t end the way I wanted, but I think it’s a story and how-to worth sharing. Learn from my mistakes.
How It Began
It all started innocently enough. I love the look of naturally-stained dining tables with painted legs. And since our painted dining table top was looking a little rough, I thought I’d give it a go!

We started by painstakingly sanding ALL of the paint off. (*Spoiler-Much to my husband’s chagrin, this would prove fruitless in the end.) Once the paint was removed, the tabletop was still darker than I wanted.
Stripping Stain
I sought out to remove what I thought was stain, so I could re-stain it with a lighter stain. I picked up some CitriStrip* which I’ve used before to strip stain off of wood furniture with great success.
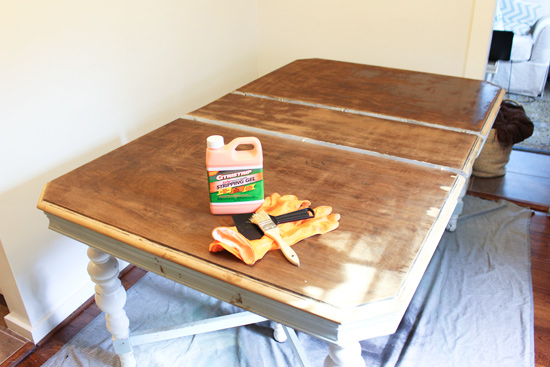
Instead of moving the table outside, I worked on it in place with windows open and a drop cloth on the floor. I poured a little out and then spread it evenly with a cheap brush.
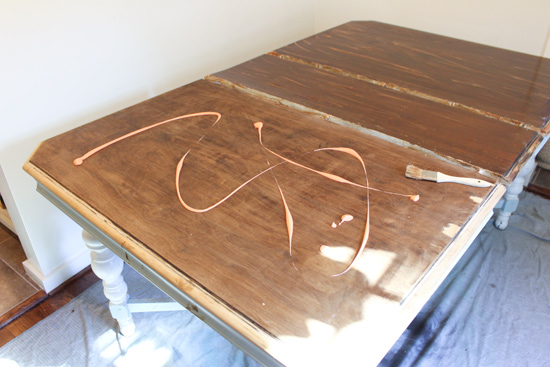
Following the directions, I let it sit for a few hours before scraping and cleaning the gel off with a plastic putty knife. This is where things started going down hill.
First of all, as I was removing some of the strip gel, I accidentally tore off a piece of what I came to realize was veneer, leaving a chunk in the top. Sure I could have filled the void easily enough, but it never would have matched the color of the existing wood around it.

Second, no stain came off with the stripper. Determined as I was, I applied it again and waited even longer before scraping it. Still to no avail.?
I slowly started realizing my dream of a light-stained table may not be coming true…but this saga doesn’t end there. Nope!
I thought “Oh I bet there is a nice top under this wood veneer! I’ll just strip it off and if it doesn’t work out, I’ll apply a new veneer that I can stain! Yeah! This will be great!” Note to self-no one would put a veneer on top of a nice table top…
Removing Veneer
After a little research, I learned that a little bit of moisture can loosen the glue that holds the veneer in place. So I got one of our rag towels wet, wrung out the excess water, and let it sit on the veneer for a few hours.

I checked it every so often by trying to scrap it up with my plastic putty knife. Once it was saturated well, it came off in sheets.
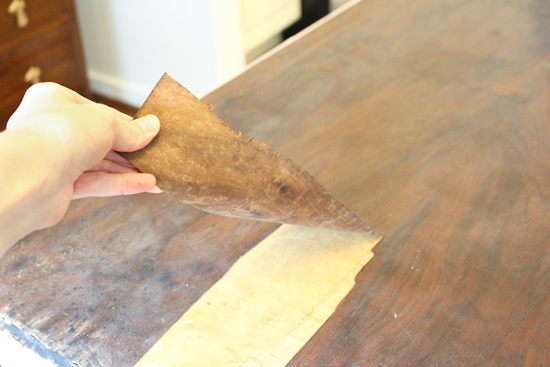
This whole dining table refinishing project was a process spread out over a year. So a few details are a little fuzzy. Like I’m pretty sure as I was removing the veneer, I accidentally went too deep and started removing a second layer of veneer. Therefore, I had to finish removing a whole second layer once I was done with the first. Another unexpected step in this process! At least the damp towel worked well!
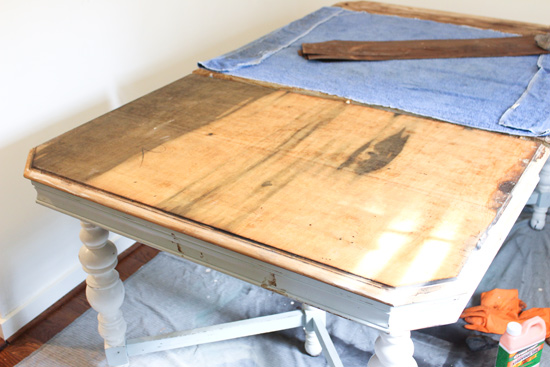
If you’re picking up on my subtle disappointed hints, the tabletop was not in a condition that one would want to stain after removing the veneer(s). Furniture makers put veneers on pieces that are made up of smaller pieces of not-as-nice wood. My table fit in this category.
It was light! Yay! But most of the wood had lots of green tones and the boards were going in multiple directions.
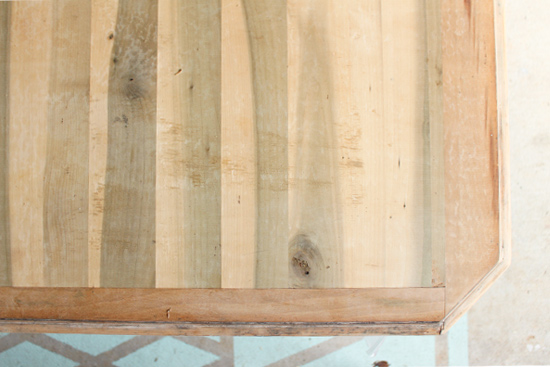
At this point I finally let myself realize that I would be disappointed if I attempted to stain it the way it was. I also realized that re-attaching new veneer required special machinery to do it well. And to buy a piece of veneer large enough for my table would cost more than I wanted to spend on this project. So that was (pardon the pun) off the table.
Painting the Table
After all of that work, it was time to paint our table again. Back to square one.?
I started by priming the whole surface with a regular water-based primer. That exposed several cracks and flaws that I then filled in with my all-time favorite wood putty*.
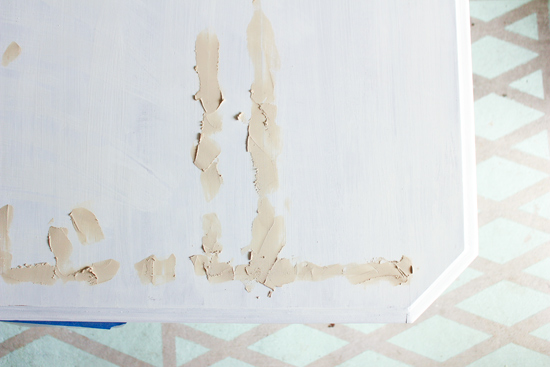
I always like to overfill the cracks and then sand it level once the putty dries. Basically I’m over this whole table at this point and have decided to sell the whole set (for more reasons than just the anxiety it has given me), I just need to paint it and spend as little time doing so as possible. So I mixed up a water-based stain with some white paint I already had on hand.

I wanted to use my paint sprayer but I wasn’t sure how it would work spraying downward onto the tabletop, so I propped up the table with my kids’ bench.

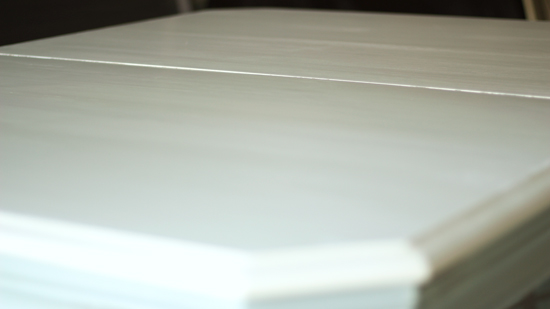
After two coats had dried, I quickly brushed on some water-based polyurethane to seal it and prevent the white paint from yellowing.
Done. And done.
Now is probably a good time to mention that the steps I took in this process are not wrong on their own. Like stripping stain with Citristrip is a great solution. If you actually have stain to remove. It was just a wrong time, wrong place scenario for me across the board.
It was with great rejoicing when I listed the table for sale on Facebook Marketplace or VarageSale and someone came to pick it up and gave me money for it! Of course I could never be repaid for the love, sweat, and (almost) tears poured into this project. But I’m just glad posting this how-to will be the last time I see this lovely specimen of a dining table.
I’m also glad to share this table saga in hopes of sparing just one of you from the same fate.?Let me know if you have a furniture makeover saga in the comments so we can commiserate together! Ha!
Thanks for Checking In! ~Chelsea
*This post contains affiliate links*



Well, your table looks great in white! So far as the frustrations with the project, you showed perseverance. Good job in the end 😀
Haha! Yes, perseverance…I like it! ~Chelsea
Thank you for this. It is a beautiful table. I was curious as to how old it is. I have pieces of stuff that have been in process(s) for years now. They are old — like over 80 to 100 years or more old. They didn’t use veneer but solid wood from what I can tell. My two Grandma’s chairs rocked at least 3 generations. This made me very cautious. I may never get it nicely to the wood. Maybe I will just paint them and save a lot of money and time. Jan
Hi Jan! What a sweet history! If it’s already painted, you may be better off giving it a fresh coat! Ha! But if it’s currently stained, chances are that it’s quality wood that would be worth the investment of time to refinish! ~Chelsea
So sorry about the saga with the dining room table. I am 77 years old and ate on a table identical to this at my grandmothers house that she had in her boarding house and cooked for locals every day. Then it went to my parents home and I continued eating on it for years until my parents passed away and it was left to my daughter. I have fond memories of this table and am sure the same will be with the person that bought your table. But, we always knew it was veneered on top but solid as a rock. Love your “fixes”!!
I loved the turned legs on this table! If only I had known that you had one on in the family I would have saved myself a lot of trouble! Lol! Thanks for sharing, Mary Alice! ~Chelsea
Hi, Chelsea. I have a table that needs to be worked on also. My table isn’t painted but has a very old finish (probably shellac). My Dad made this table in “G.I.” School in the 1940’s when he got out of the army after World War II. The finish (whatever it is) is failing. I’m not sure what I need to do to refinish the top nor what to use to clean the old finish off or what to use as a better, new finish. Any ideas??? I enjoy reading about your family and all of your projects. Keep them coming!
Hi Brenda! Depending on how deep the finish is messed up, you may only need to sand the shellac or polyurethane off and reapply a few fresh coats! If you have to go dip to get the finish looking even and nice again, then you may want to use the Citristrip I used to chemically remove the finish and stain and start from scratch! Sounds like a lovely family piece! ~Chelsea
Oh my gosh, Chelsea! This reminds me SO much of the time I decided to repaint an old sewing machine cabinet! I definitely had tears involved in my DIY saga. Haha!
Ahhh!! Those stubborn projects definitely stick with you! You probably still can’t look at a sewing cabinet without grimacing!? ~Chelsea
You are soooo cute! Your heart is always in the right place; I tell my husband that these projects are trial and error, but a fun challenge. I very much reading your posts and I record and watch your show with your dad faithfully! God bless!
Aww thanks so much for following along, Ema! Happy to have you as a viewer and reader! 🙂 ~Chelsea
Chelsea, what type and brand is the paint sprayer you use for doors and cabinets? Thanks.
You and your dad are great to watch.
Thanks, Gary! This is my current favorite sprayer: https://amzn.to/2E6trvq It’s the upgrade model from the one we’ve used on Today’s Homeowner on several occasions which I like because it’s slightly more versatile and has better coverage. (That’s an affiliate link. If you purchase from it, I’ll receive a small commission to support to my site without any added cost to you!) ~Chelsea
What a gorgeous white table! I would have grabbed it up as well:) Thanks for sharing.