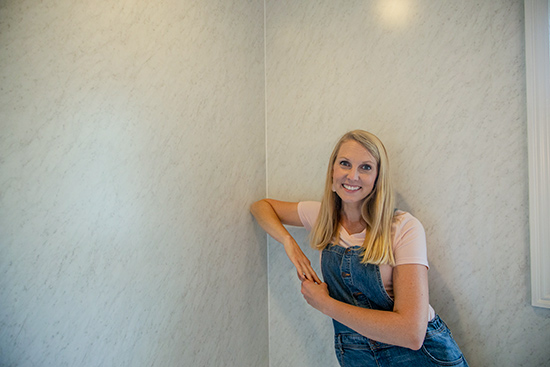
How I Elevated our Bathroom with Wall Panels
Did you know there are alternatives to tile or cultured marble for your tub and shower? I’m sharing how I elevated the look of our bathroom during our renovation buy installing waterproof wall panels instead of traditional wall tiles.
When it was time to start planning our bathroom renovation, I automatically thought of which tile I was going to use around the tub/shower and what color I was going to paint the walls. But then I discovered that there is another DIY option that still gives you that same custom, high-end look!
This project is sponsored by WetWall, a Wilsonart Company. I love trying out new products to share with you and feel honored brands trust me with their latest brainchild!
In fact, it actually saved us so much time on installation! Watch the video above to see how Dad and I transformed our hall bathroom with wall panels from WetWall!
Materials Needed
I’m willing to bet, if you’ve done a few DIY projects around your house, you have most everything you need to get started installing your own bathroom walls!
- circular saw
- jigsaw, maybe
- straight edge
- caulk gun
- suction cups*
- hole saw, size depends on your plumbing
- drill
- WetWall panels, I choose Torrone Marble*
- panel adhesive
WetWall is made by the same people who make laminate countertops! So you know it can hold up to a beating! And I’m assuming 3 small kids will be rough on a bathroom.
The panels come in various widths, but they’re all 8 foot tall. What I’ve really come to appreciate is that you can cut them just like any wood sheet goods, aka with a regular circular saw!
You don’t need any specialty tools (except maybe the suction cups) that you’ll never use again.
Cut and Drill for Plumbing
If you’re just installing these panels around your tub or shower, the entire project can be completed in as little as 2.5 hours! Tiling would take more than that just to set the tiles, not including dry time, and you’d have to come back another day to grout.
Since they come in 30″, 32″, 34″, 36″, 48″ and 60″ widths, it’s likely all you’ll need to cut is the height from tub to ceiling.
Start with the panel on the back wall of your tub alcove. Cut and install it before measuring and cutting your side pieces. Like I said, we used our usual circular saw to cut the panels, just be careful to protect the pretty side of the panel!
After your side panel is cut to size, you’ll want to use a hole saw and drill to cut out for any plumbing. Our shower design just included 2 holes, one at the bottom for the valve/control and one at the top for the showered stem. Measure from the center of the pipe to mark and drill your panel.
Add Adhesive and Apply Pressure
Another thing that makes these panels awesome is that you don’t use any fasteners! (This helps keep it waterproof.)
To apply to the wall, you need a clean, smooth surface. For our bathroom, the half-tile walls were in rough shape. So we completely demoed and started with fresh, new, moisture-resistant drywall.

But if your tile is in good shape, you can apply the panels directly on top!
Spread the panel adhesive that is part of the wall panel system according to the directions so it doesn’t ooze out from behind your panel.
The suction cups came in real handy to hold the panel steady while maneuvering it into place on the adhesive. We used 2, one for me and one for Dad.

Once the panel is where you need it, apply props to maintain equal pressure while the adhesive sets up. We used a scrap board on the edges, though the screws did not go through the WetWall.

You can also create pressure with a series of 2x4s since the surface is scuff and scratch resistant!
For walls longer than 60″, like the wall behind my vanity, you’ll want to order panels with tongue and groove edges. Then you apply some color-matched sealant on the tongue to seal the seam when they lock together.
Caulk Corners and Dry
After all of your panels are installed, go back with the color-matched sealant and caulk any corner where 2 panels meet to keep any water from seeping in. Wipe off excess sealant with mineral spirits.
Once all of your sealant is cured, you have a totally waterproof, totally beautiful shower surround that’s worthy of a swanky hotel bathroom!

I love all of the great patterns that you can choose from. I was so tempted to go with one of the woodgrains, but decided to bring in my wood tones with the switch cover and vanity door fronts. I think this marble is cool without being too trendy so we won’t get tired of it anytime soon! Especially when it holds its own against the kids’ antics!

Thanks for Checking In! ~Chelsea
*This post contains affiliate links.*

One Comment
Laurie
Chelsea, I purchased the wetwall and the suction cups from Home Depot that you had a link for. I cannot seem to get the suction cups to stick. The pop right off once a little pressure is applied. I need them to help close the gap on the tongue and groove. Any suggestions as to how you go the cups to stick?