How to Update Old Cabinets & Counters Under $1000
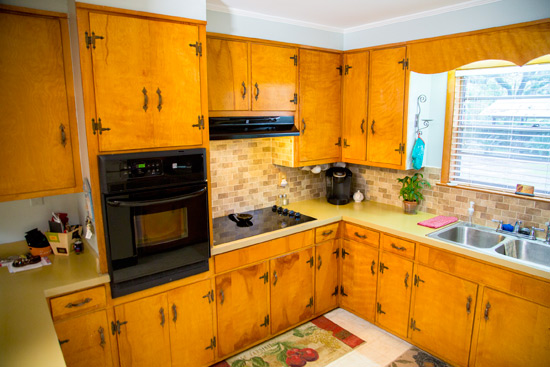
No that photo is not photoshopped! The cabinets really were that orange before we got started. And yes! You don’t have to remove walls, replace cabinets or install top-of-the-line granite to update the look of an older kitchen. OK, you may want to! But these few steps can give you a great-looking kitchen without much of a monetary investment because sometimes dreams don’t equal reality.?Do one, do all! Either way it will make a difference you will appreciate for years to come!
Eliminate Wall Cabinets
This kitchen was so closed in with the cabinets hanging over the existing peninsula.
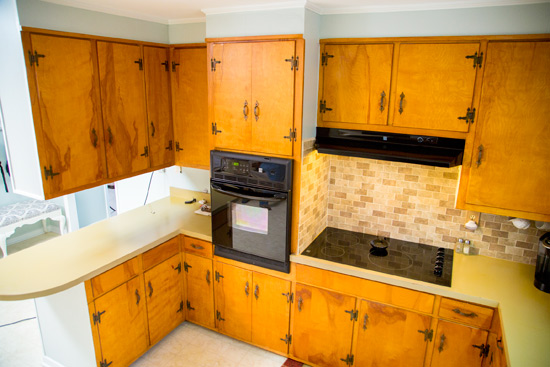
And since the homeowners had a lot of other cabinets for storage, we removed those cabinets first thing! It immediately opened up the kitchen and made it feel bigger! We did have to do a little drywall repair on the ceiling after removing the cabinet, but it was totally worth it!
If you don’t have cabinets in this same exact scenario, perhaps you could remove some wall cabinets in one section and replace them with open shelving. Now I will say I’m not the biggest fan of open shelves, practically speaking. But if you’re working with a small kitchen, it would definitely help make it feel bigger while still giving you a little bit of storage on the shelves themselves.
Cabinet Door Overlays
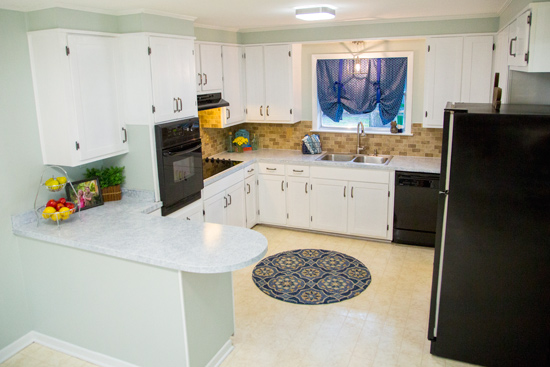
The cabinet doors in this kitchen were PLAIN. But with about $45 worth of plywood (and a lot of paint), you can make your cabinet doors look like BRAND NEW DOORS. We made these look like the Shaker-style doors that are popular these days. You can watch the full how-to video here.

We’ve also done an applied molding look on cabinet doors too that’s a similar process but gives you a different look. That information can be found here.

Replace Hardware
For this particular kitchen, the hardware definitely dated the cabinets just as much as, if not more than, the stained pine doors. So my next tip is to change the hardware (drawer pulls, cabinet knobs and hinges) in your kitchen!
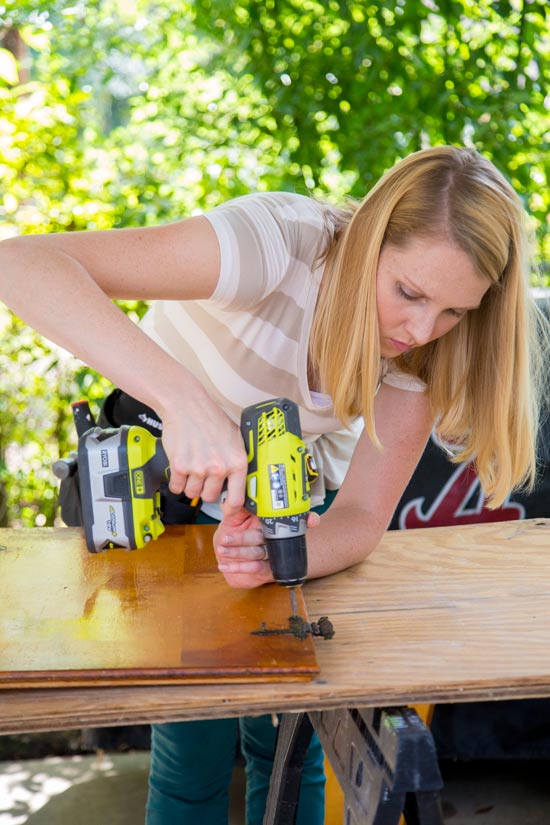
If you’re budgeting and can only afford so much at a time, you can buy new hardware one month and then the materials to update the cabinet doors another month to spread out the costs. This is also a good tip for an area like a bathroom or even dressers in a bedroom. The best part is that if you buy new hardware with the same footprint and holes as the old ones, all you have to do is unscrew the old and screw in the new! Easy peasy!

Paint the Countertops
This one is my favorite! We’ve used this kit from Giani Granite* before and I love it! It literally makes old formica or laminate tops look like granite! There are several different kits to choose from depending on what you want your finished ‘granite’ to look like. But they all apply the same way. Apply a black primer coat (which comes in the kit), then you sponge on 3 different colors of mineral paint.

After the paint dries, you seal it all up with several coats of a top coat (also included in the kit) and your countertops are as good as new! And it’s only an $80 investment!
Just look at it once we were done!

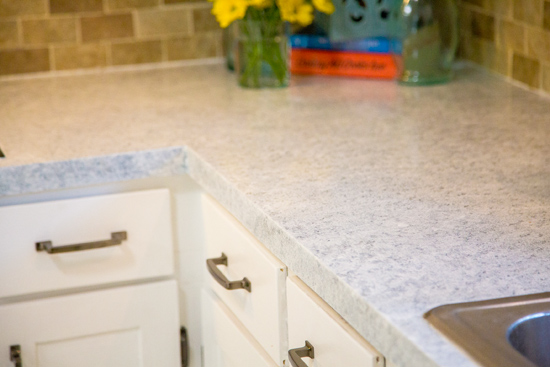
This is life-changing stuff, y’all! And this is not a paid endorsement. I truly think painting your countertops to make them look better is the bomb-diggity!
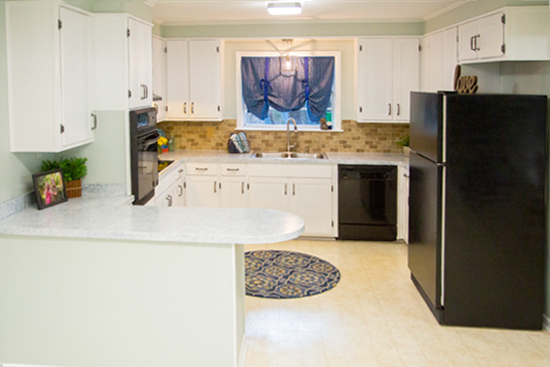
So there you have it, 4 ways to update your kitchen (and your bathroom too, for that matter) for less than $1000. I will leave you with a few before and after pictures. For more on this kitchen update, you can watch the full episode of Today’s Homeowner online now!


Thanks for Checking In! ~Chelsea
*This post contains affiliate links for your convenience.*



I love what you did. I just wish there had been enough money to update the backsplash. I think you can paint that too, can’t you? I love reading your makeovers.
Wow! Looks great! I have white counter tops and may try the faux granite kit!!! I just can’t afford the granite at the moment but I love the look!!! Great transformation!!!
It’s really easy, Christine! Good luck! ~Chelsea
This was a fabulous make-over! And the best part very easy on your wallet! I watched it on the TV show. Thanks for showing such affordable projects. I have been watching for a very long time.
We’re glad to have you as a fan, Barbi! Thanks for stopping by! ~Chelsea
That’s a thumb’s up….what a great transition in the kitchen……
Haha thanks Helen! ~Chelsea
Beautifully transformed Chelsea! I agree, open shelves also invite dust, but a small glass shelve close to the stove would help pick up frequently items for cooking, cleaning glass is easy.
Thanks for sharing, i plan to change the old laminated flat door shelves at my mom’s place to shaker style and paint it.
This is great because you know the boxes are well made and why waste what works
I agree Betty! ~Chelsea
Beautiful update, I did similar with my kitchen. I took off the doors and added trim and wainscotting wallpaper and then painted them. Then also did a faux marble countertop. It’s been over 6 years now and all of it is still going strong. I love the crisp white you chose.
Do tell please. I didn’t know about the wallpaper idea. I’m fearful that painting knotty pine won’t hide the knots for long.
This is not my house so I cannot vouch for this specific project. But I successfully used the B-I-N shellac-based primer in my daughters’ bedroom to cover knotty wood paneling and it has held up well! We even painted it light pink and there are no knots showing through! Totally understand your concern though! The B-I-N primer is the key! ~Chelsea
Hi. Please tell me more. Has it held up well?
Hi Chelsea. I just came across a blog from when you did your kitchen. My mom’s kitchen has the EXACT same cabinets. Her house was built in 1965. My parents are the second owners. My dad passed away about 2 years ago. The kitchen needs a paint job. I bought the paint, ultra white. Now after seeing some makeovers from the same time period, I’m having second thoughts. Budget is a concern. I’ve liked how some people have closed in the top of the cabinets. What a dust collector. I think I can pull it off. But then I thought why not paint that area a different color. Another idea was to paint the upper cabinets with white chalk paint and just really clean the lowers, even maybe use liquid sandpaper and tone down the orange. As for the hardware, changing them is costly but I can perhaps go for it. My concern is the holes on the doors and filling them so they don’t show through. We have open shelves above the stove and fridge. I hate them. It’s a grease collector for a kitchen that always cooks from scratch. Mom is a fussy eater. These 2 sections of open cabinet shelving are 36” wide, 16” tall and 11” deep. In all it’s 2 shelves with an 8” difference. The border around the front is scalloped. Oh, there was a scallop valance above the sink. After my dad passed I took it off. Lol. As for the scallops remaining, I want to take a jigsaw a eliminate the curves so they are straight. I wish I could remove them but they are what is keeping them together. These as you know are solid wood and well built. I guess I could put doors on them. Hmmm…there’s an idea. The counter is butcher block looking Formica. It’s in excellent condition. The back splash is white tile with those indentations? I wish I knew the name. I can’t remove them but maybe put some decals or something. Well, I said a mouthful. Lol. Since my mom is 90, I am trying to bring the house up close to the 21st century for when it has to be sold. I would love it if I could get some feedback from you and ideas. It’ll be me doing it all. I thank you for reading my comments and appreciate any feedback.
I have had a Giani diy countertop for 13 yrs. It is showing wear now and I am wondering if I can use another Giani kit to transform them if I sanded the top surface ? Thank you for your help.
It certainly seems like you could Delaney! How fun it’s lasted this long! ~Chelsea
I have the same cabinets and hardware. I would love to k ow what you new hinges look like and how they secure to the door
ugh i have the same cabinets and hardware too! The front mount hindges are literally impossible to replace unless I fill the holes on the front of the door. 🙁 I want to keep the wood, refinish it and clean it up and just add modern hardware but it’s impossible!!! 🙁