Simple Recipe That Cleans Caulk without Scrubbing
The caulk around a kitchen sink or bathtub is very susceptible to mold, but it can be hard to scrub clean. This recipe with household ingredients makes it easy to clean mold without any scrubbing!
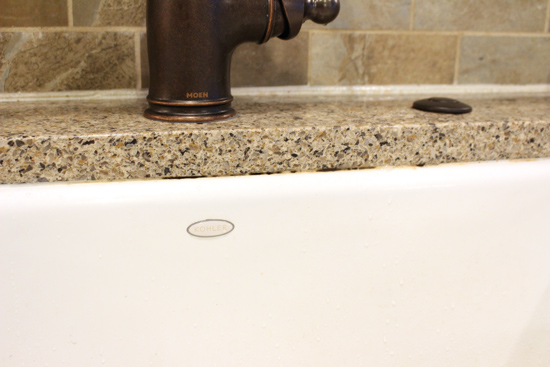
This magical paste kills and removes the mold.
What You Need
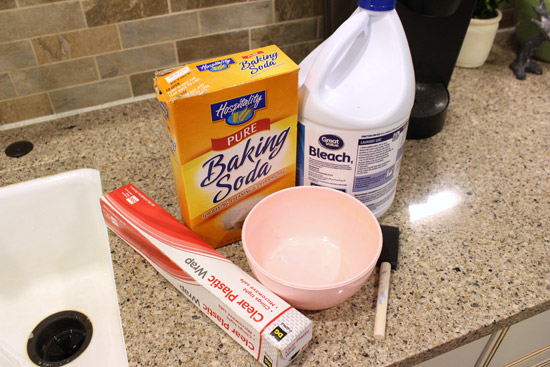
- bleach
- baking soda*
- plastic wrap*
- cheap brush*
- small mixing bowl
Mix It Up
Mix a little bleach with a little baking soda to create a paste. Use a disposable paint brush or something similar since the bleach can quickly ruin whatever you use.
Generously brush the paste onto your caulk.

Once you’ve adequately coated your mold with the paste, cover it with plastic wrap. This helps slow down the bleach from evaporating so it can really work its magic!

Let It Soak
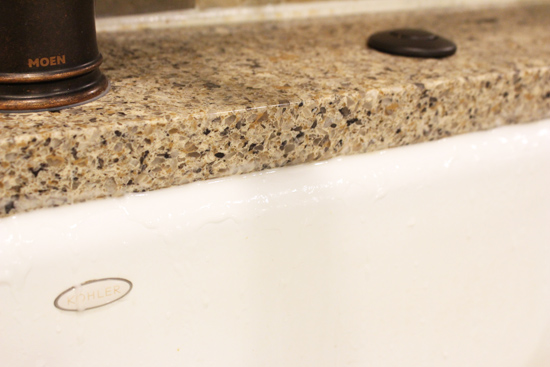
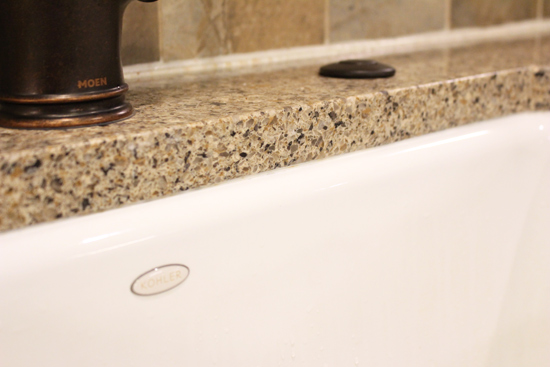
Leave it on for a few hours, or overnight. Then remove the plastic wrap and rinse the paste. If your mold isn’t completely gone, simply repeat the process again. My nasty mold and mildew cleared up in one application!

So even if the mold comes back (which it will!), this process is so easy and painless that I don’t mind having to do it once or twice a year.
Eventually I’ll add some more caulk which may eliminate the need for this at all. But until then I’ll just use my magic mold paste. I made a large batch so I can clean the caulk in my bathtub too, so consider that when you’re mixing yours!
**Update-I did add more caulk and the caulk hasn’t gotten moldy since! Since the caulk was shallow, it allowed water to sit on the caulk. But once I added more caulk, there wasn’t a resting place for water anymore! So just a note to investigate the cause of the problem while you’re improving areas of your home too!
What methods do you use to clean mold or keep caulk from getting moldy in the first place? Do you have a natural mold cleaning recipe you care to share? Comment below and let me know!
Thanks for Checking In! ~Chelsea
*This post contains affiliate links.*




What a great tip! Thank you for sharing!
Best,
Kelly
Is this harmful on a granite surface? I know any acid such as vinegar is a no no but nit sure about bleach. I have a persistent area in my caulk behind my kitchen faucet and the grout on the backsplash in that area that just won’t stay dry but I worry about tuining the granite. I have googled this issue and can’t find anything. Help!
I would say give it a try at least once. It can’t be worse than mold, right?!
I wish I had this post when we lived at our previous house! The mold was SO annoying. I scrubbed and scrubbed … wish I had this paste to work it’s magic. SUCH a great idea.
Um, this is awesome! I definitely need this right now while we are trying to sell 🙂 Thanks for sharing!
I think I’ll try this on my white grout too. Seriously, who in their right mind thinks white grout is a good idea?????
I’m sure it looks pretty though when it’s clean! 😉 Use a grout sealer to help keep it from staining once you have it clean! ~Chelsea
I think clear is even worse if it gets behind it. Its just black.
I tried this today in a walk-in shower. Oh My Goodness. It worked. I didn’t use the plastic wrap, thought the shower stall would have enough humidity. I left it for a few hours. I ALMOST wish I’d taken a before picture. But then I would be embarrassed for the black, yucky grout in places. It also worked really well on the soap build-up in the soap holder. Thanks for sharing!
Ahh! So satisfying! Thanks for sharing, Anne. ~Chelsea
I’m always so impressed when simple ingredients can clean the toughest/grossest messes around the house. Thanks for the tip Chelsea! 🙂
Will definitely be trying this on my shower – thanks for sharing!
Is this safe to use on grout that is along a sealed granite or marble countertop? Also, we have a brand new white ceramic and porcelain tile (some of each) shower with white grout. When I asked the installer about sealing the grout he said “don’t do it! All the sealers claim they won’t yellow, but they all do.” Comments, anyone? Hate the thought of constantly cleaning grout.
I’d say it’s safe to use along granite and marble! As far as the white grout, that’s a good question! I’ve never had experience with grout sealer yellowing. I applied a spray sealer onto the white grout at my fireplace and haven’t noticed that yet! It’s been about 7 months. Here’s what I used if you’re interested: http://www.homedepot.com/p/Custom-Building-Products-TileLab-SurfaceGard-24-oz-Penetrating-Sealer-TLSGS24Z/202907662
Hope that helps! ~Chelsea
Does too much bleach strip or damage the caulking?
Hey Jen! That’s a great question. I really do not know for sure, but I’d guess that it definitely could damage the caulking if used too often! ~Chelsea
What a great tip. I’ve tried a few tbings, but nothing has worked well. If you are average height, you might not notice the build-up, but if your guests are on the short side, they will certainly notice it. Thanks!
Haha! Yes you have to be conscience of guests of all heights!? ~Chelsea
Thank you so much for this! I just discovered this problem with our undermount sink and had a minor freakout that it was going to be a big problem. I have the mixture sitting right now!
Any tips on keeping the grout behind the faucet in good condition? We have tried silicone and the other more cement kind with sealant and it just seems to deteriorate so fast with the constant water contact. There isn’t that much space at all behind the faucet and back splash/caulking. It’s driving me nuts. We currently keep a towel behind it. Ugh!
OMG! I have been disgusted by the black mold which has “invaded” the caulking on my kitchen sink for years. I have tried everything sort of putting in a new sink. I happened upon your suggestion yesterday and gave it a try today, letting it sit for about 4 hours! It’s like I have a new sink!!! THANK YOU for this wonderfully easy, effective solution! I can’t wait to tell my daughters about this as this problem eventually gets to all of us. I am thrilled.
WAHOO! Thanks for sharing your success, Connie! ~Chelsea
Can this be used to clean the white caulk that was used to seal the crack between a granite countertop and the white backsplash – our faucet really splashes up on to the caulk and it is already discoloring. I have heard not to use bleach or citrus products on around granite, but anything milder does not seem to be getting the discoloration out.
Hi! I do not know about using bleach around granite. But I’d say it’s worth a try since slightly discolored granite is better than moldy caulk! ~Chelsea
Is the paste safe to use on a stainless steel sink?
Hi! Since it is not recommended to use bleach on stainless steel since it may dull the finish, I only recommend using this paste on a stainless steel sink if you prefer no mold over a dulled finish around the edges. ~Chelsea
I wish I took a before picture! Black mildew/mold is gone! Left it on for about 3 hours- able to use sink since solution was covered with plastic wrap. It’s gone!!! Looks fantastic! Thank you Chelsea!
Awesome! I’m going to use this hack in our new house. The bathroom doesn’t have a vent fan so mold is growing rapidly! First install a fan, then I’ll treat the mold! 🙂 ~Chelsea
This did not work for me. I left the paste sitting on the moldy spots all day long. SO disappointed!!!