I love my garage! It’s such a workhorse that stores stuff long-term, holds my project materials and tools, and serves as a place to park my car! My garage building is divided into 2 basically equal sides. The right side is where I park my car and the left side is my shed where we keep paint, the lawnmower, ladder, etc. Unfortunately, I also have some stuff stored along the edges on the garage side as well.

Not ideal, but it still leaves me just enough space to park my hand-me-down Honda Pilot. I also use this space to build things and cut lumber since the open garage door provides lots of light and it’s easy to move the car out. And every time I’d move the car to start a project, I’d think how much more fun it would be if there was a cool designed painted on the floor of the garage.
I wasn’t interested in coating the entire floor, but something that looked like a rug in the center would be perfect! So I hit the interwebs to see if there were any interesting rugs I could copy. My one requirement was that it have straight lines so I could use painter’s tape. I really didn’t want to be free-handing anything! This is the pin I found:

(source: Pinterest.com)
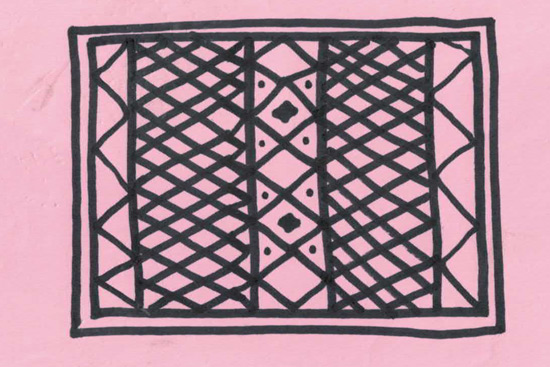
And this is my painter’s tape-friendly version I sketched out to follow along with:
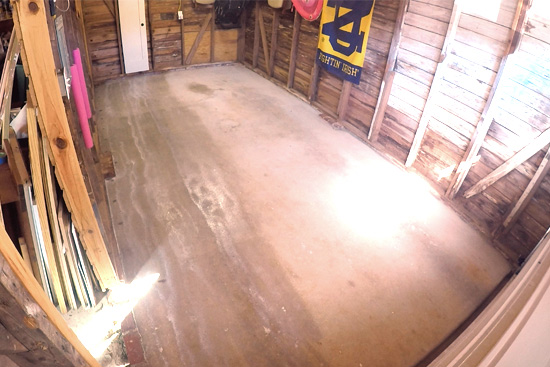
Buuutttt before I could get to the fun part of painting, I had a little prep work to do! You see this concrete was poured almost 5 years ago, but it was never sealed. So it’s got a lot that needs to be cleaned like the classic oil stain and some paint drips here and there. To clean it properly I needed to clear out everything that was sitting on the concrete.
I had picked up this concrete cleaner probably a year ago when it was on clearance. Directions called for pouring it undiluted on really tough stains, like the oil spot. So I started with that.

While it was working away, I mixed up the rest of the cleaner with some water in a pump-up sprayer, also per the instructions. I covered about half of the floor with the solution before using a scrub brush to work it into the concrete. The oil stain just melted away with a little elbow grease!
Once I had made my way across the entire floor, I went back with my garden hose and rinsed the cleaner off really well.
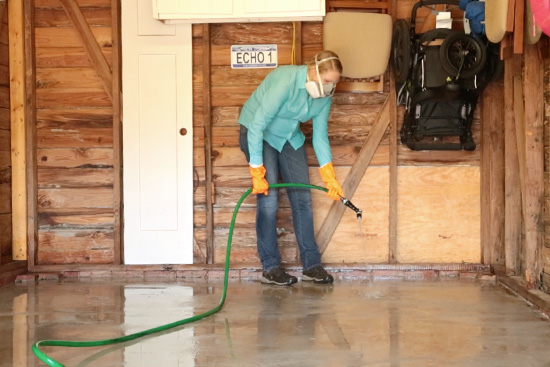
I waited the recommended time, I think 24 hours, before I carried on with my next step, sealing the concrete. This really should have taken place 4 years ago after the concrete had cured. But since it didn’t, I took the time now to do so. It’ll help the paint stay on top of the concrete instead of sinking down into the pores of the concrete. It’ll also be good for future oil stains and paint drips which are bound to happen again!
I had some Thompson’s Water Seal Multi-surface Waterproofer laying around, so I used that in a pump-up sprayer. It was a super quick job to lightly spray the entire surface before letting it dry and cure. (I have a story for another day about how ‘spraying it lightly’ it should not be taken lightly!)
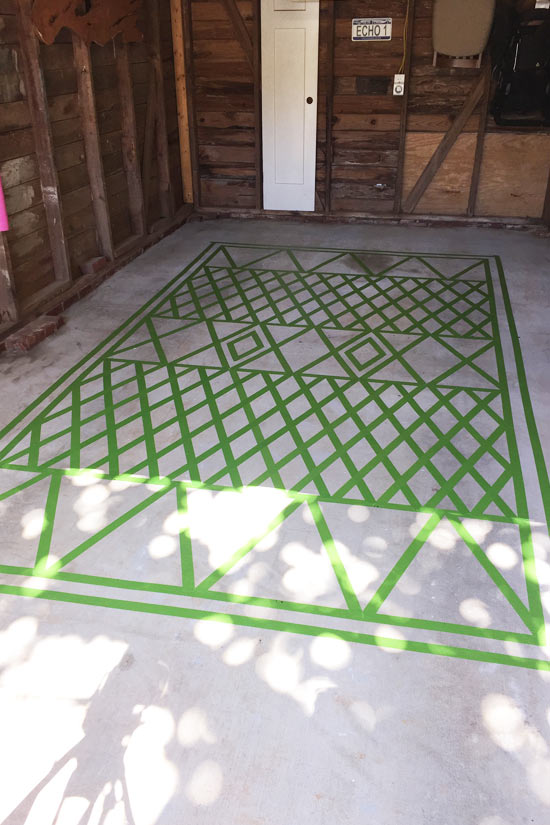
After the proper dry time, I was finally able to map out my rug with my painter’s tape. Spoiler alert~I used about 3 rolls of painter’s tape to create my design. So keep that in mind if you’re doing a similar project. You’ll want to make sure you have plenty of tape of the same width before you start!
First I arbitrarily determined I wanted the rug to be 18 inches from the sides and 36 inches from the front and back of the garage. So I put a small piece of tape at each corner, after measuring, so I was able to mark the true corner with a marker.

Then I carefully taped along the mark, stretched my tape out to the next corner, and gently laid it on the ground before running over the entire length of the tape with my hand to make sure it was good and stuck. This is the best way I’ve found to get a straight line of tape over a long distance. It’s probably best demonstrated in the video at the top of this page.
Once all four edges were down, I applied tape 2 inches in all the way around to create a small border for the whole rug. After that, I slowly laid out my tape to match my design, modifying as needed. I found it helpful to start in the middle and work my way out.
When I was satisfied with the tape and smoothed it all down to prevent seeping, I got the paint out! I used a product I didn’t know existed before this project, a 1-part epoxy that cleans up with water for concrete and garage floors. It’s from Behr and can be tinted to any color, which was really my only requirement when it came to picking paint for this project!
The directions on the paint can say to use a 3/8″ nap roller, so that’s what I did! It went on so well and fairly fast. For whatever reason, I painted one section at a time, checking for places I might have missed as I went along.
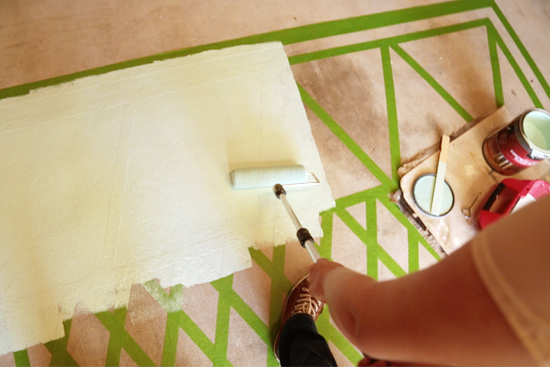
By the time I got the roller and tray cleaned up, the paint had dried enough for me to begin peeling the tape up. It was fun to see my design appear as the web-like tape came up!
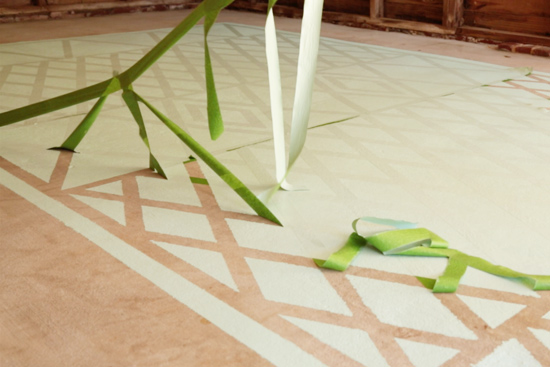
With all of the tape gone, the only thing left to do was wait for it to fully dry before bringing stuff back in! It’s also recommended to wait 7 days before parking a car on it, so I definitely followed that!
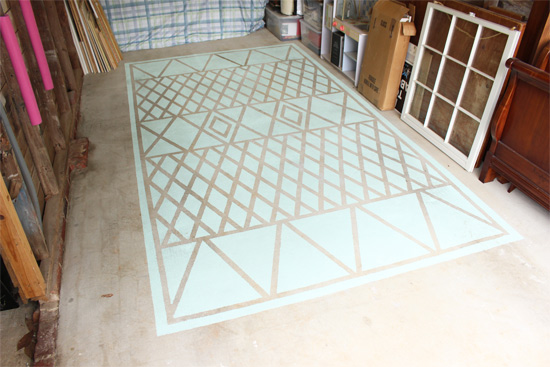
This was a great push to clean out some of my stored items like scrap lumber and reorganize the stuff I wanted to keep, especially utilizing the storage I have in the open rafters above the garage. I have several things I’ve pulled out of trash piles to refinish too but haven’t gotten around to doing so. One of them is this ‘lovely’ cart that’s been refinished into a bar cart just in time for the holidays.

What fun things have you done to spruce up your garage? Would you ever paint anything on your concrete? Share in the comments below. I love hearing from you! Thanks for Checking In! ~Chelsea


Hey Chelsea..great job on the garage floor! So when is the baby due and do you know..OR WANT to know..boy or girl?
I’d love to see you maybe give some ideas on how to store seasonal large plastic “buckets” of crafts out in the garage..I have one for every holiday..I know..obsessive!
I have mine stacked and labeled, but it’s a pain to have to pull out the bottom ones..it would need to be a not so involved solution..
Thanks so much..
Thanks, Dianne! Baby is due at the end of January. We know the gender but haven’t really told people yet!
For your storage dilemma, have you thought about a metal rack? They’re about the same depth as plastic storage totes, so it shouldn’t take up anymore room in your garage. We’ve used them in an attic before that you can see here: http://www.todayshomeowner.com/video/organizing-and-adding-storage-space-to-your-home/
Hope that helps! ~Chelsea
What a great way to spruce up a utilitarian area and catch-all like a garage! Yours looks terrific – the painted rug definitely adds some cheer and flair.
Thanks, Stephanie! It brightens up my arrival home everyday! ~Chelsea
I loved your Garage Rug, I didnt hear you mention a sealant over the rug to protect it from the wear from the car tires. Why did you add a bit of color in some of the diamonds for a bit of pop and realistic look, even though its a garage, you painted a rug on the floor. Nice project I’ve always wanted to paint a rug on the floor thanks.
Thanks, Ruth! The paint is formulated for garage floors and didn’t require a sealant over it. I do, however, expect a little wear and tear from car tires and my future projects! ~Chelsea
Where you used the one part garage floor paint I would recommend using a sealant over it. Unlike to two part garage floor epoxies the one part paint is just not as durable especially with hot tires parked on it for extended periods of time. Rustoleum offers a fantastic gloss clear coat that you can apply over it and you can buy that at your local Home Depot in the paint department. Cheers! From a fellow DIYer
Thanks for sharing, Mike! I’ll have to look into it. ~Chelsea
I noticed you did not use any kind of sealer over the cement paint. Aren’t you concerned about it coming off with wear and tear?
Hi Kim! The paint I used from Behr does not say to use a sealer on it. There have been a few small spots that have come up over the years, but overall I’m not worry about wear and tear since it’s a garage! ~Chelsea
Chelsea- this looks so pretty! Especially considering it’s a garage floor! I don’t have a garage but I have been considering painting my concrete patio. Would I use the same type of paint that you have on the garage floor? Is it durable for outside placement? Thanks for any help you can give me.
Thanks Linda! The paint does say it can be used for patios. Here’s what I used: https://homedepot.sjv.io/c/1980335/456723/8154?u=https%3A%2F%2Fwww.homedepot.com%2Fp%2FBEHR-Premium-1-gal-Slate-Gray-Self-Priming-1-Part-Epoxy-Satin-Interior-Exterior-Concrete-and-Garage-Floor-Paint-90201%2F308800274
Hope that helps! ~Chelsea
I was watching this weeks episode of helping a perosn convert their garage into a workshop and you showed a paint sprayer stating that you loved it, I was wondering what was the name and make? I couldn’t make it out on the tv show.
Here’s an affiliate link to get it on Amazon! https://amzn.to/386wzX4