Now that Thanksgiving has passed, I can wish you all a very, merry and magical Christmas!
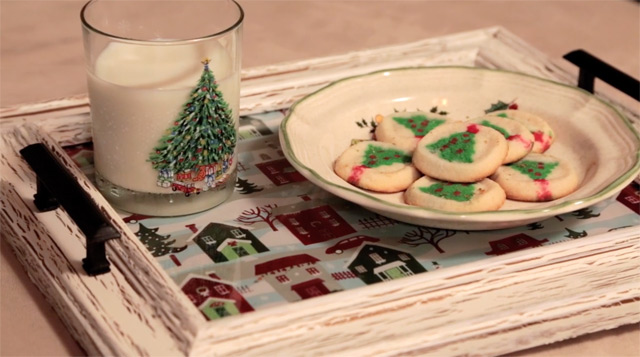
Part of the magic of Christmas is a child’s belief in Santa Claus. I know I was very reluctant to believe otherwise! So this month’s project is creating a tray to hold ole St. Nick’s cookies and milk on Christmas Eve.

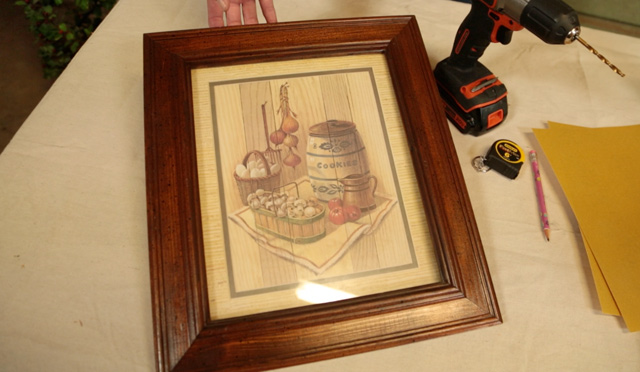
It all started with a $3 frame from a local thrift store.

To make the frame look more like a tray, we picked up some decorative cabinet pulls from the hardware store. Before we got started on the real transformation with paint, we drilled the holes for our pulls, centering them on each of the short sides of the frame. Here you’ll want to use a drill bit that’s the same diameter as the screws that come with your pulls.
Once the holes were in place, we lightly sanded the entire surface of the frame with a medium grit sandpaper. It’s always good to rough up any varnish before painting. We then followed up the sanding with a good wipe down.
We wanted to jazz up the paint finish on this tray to make it more sparkly for the holiday. So we decided to create a crackle finish.
I’ve seen specialty paints called crackle finish in the stores, but nothing is as fun as making it yourself. Especially when it involves glue!
Yes, that’s right. Glue is the secret to making your paint crackle. The first step to a crackle finish is a base coat of paint. For our tray, we used a gold metallic spray paint. You can use spray paint or any latex paint as your base.
It didn’t take long for it to dry and we were able to apply white school glue. We used a cheap brush to coat the entire frame, including the edges, with an even, light coat of glue.
This is the tricky part, knowing when to paint over the glue. You want the glue to still be tacky when you paint your top coat, but not wet. It shouldn’t take too long if your glue isn’t applied too thick. Then you paint your top coat right over it. We went with a creamy white color.
As the glue under the paint dries, it pulls the top paint apart and crackles it allowing the base coat to shine through!

I’ve used this technique to refinish an end table for my sunroom. It’s blue with black underneath! Have fun choosing your base and top coats in contrasting colors!
With the glue and paint dry, we moved on to installing the pulls on the front and some vinyl bumpers on the back to keep the tray from sliding around and damaging whatever table or furniture you set it on.

We then cut out some Christmas wrapping paper to fit in our frame-turned-tray. You can also use scrapbook paper or wallpaper scraps! And this part makes the tray so versatile because you can change the paper out seasonally. Or match it to your home’s decor and use it as decoration year-round!
I’ve seen similar trays as part of a styled vignette on a coffee table that look great. Or set it on your guest bed with snacks and a small flower vase next time you have an overnight guest. Oh the possibilities!
But before you get carried away, don’t forget to set it in the living room with some Christmas cookies and milk for the bearded man coming down your chimney!

Merry Christmas to all, and to all a good night! I hope you all have a blessed and holy Christmas celebrating the real reason for the season, the birth of Christ. Thanks for Checking In! ~ Chelsea


On the Christmas tray out of a frame…..what was the bottom? Was it the backing from the frame? Is it strong enough for milk & cookies? Did you also use the glass?
Thanks
Hi Ingrid, we used the glass and the cardboard backing from the frame for the bottom of our tray. We secured them with staples on the back side. It seemed to hold up to the milk and cookies when we carried around! Hope that helps. Merry Christmas! ~ Chelsea
Would you recommend crackle paint for kitchen cabinets or something else maybe?