
How To Install Beautiful Privacy Window Film
Quickly Add Privacy to Your Bathroom
A quick way to add privacy to bathroom windows is with frosted privacy window film. You still get natural light streaming in without dust-collecting curtains.

Each of our bathrooms had shear curtains in the windows from the previous owners when we bought it. They were not my style and added to the dated style of the bathroom, but they provided much needed privacy.

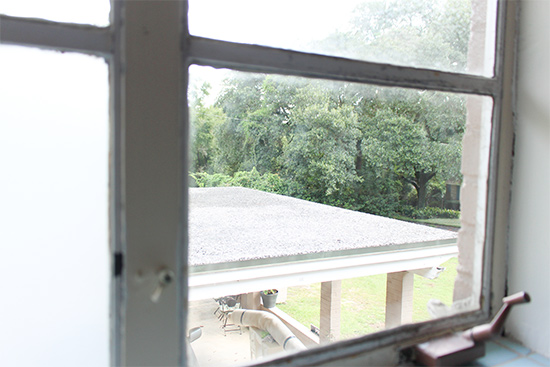
Our master bathroom is on the side of our house and standing at the vanity you can see straight out to the street. Which means the reverse is also true.😳 The hall bathroom was less-pressed for privacy from passersby. But you could see in from our backyard and carport.
Since we have plans to replace our windows in the next year or so, I didn’t want anything expensive or complicated. And that’s how we landed on this frosted window film.
What You Need
- frosted window film*
- sharp knife*
- application solution*
- tape measure*
- straight edge/credit card
- scissors
- scotch tape
A few notes about the materials for installing privacy window film. Gila makes an installation kit* that’s about $10. They did not have them in stock at my store when I was purchasing, so I opted for the individual bottle of application solution, a small knife, and using a card from my wallet. It ended up costing a little less, and now I have a sharp knife that I needed to have on hand anyway!
Clean Windows Well
Obviously you’ll need and want to clean your window glass well before you apply anything to it. But after cleaning with a rag or paper towel, you’ll want to run over it with a lint-free cloth, like a lens cleaning cloth or those that come with phone screen protectors, to get any remaining lint or fibers. They will show through if you don’t!
This was one other small aspect that came with the full ‘installation kit’ I mentioned above. But finding something around your home will do the job just the same!
Measure and Cut to Size
Unlike other types of insulating window films I’ve installed before (and love!), this film adheres to the glass of your window panes. So you’ll need to measure each pane of glass individually, though I’m sure they are all the same size!😉

You will want to cut your privacy window film an inch or so wider and longer than the measurement for wiggle room. Fortunately it cuts easily with household scissors and it doesn’t have to be pretty or super straight, as long as you cut a little excess. We’ll trim it later.
Apply Window Film Solution
To help pull the film apart from the protective cover, attach a piece of scotch tape on each side.

Before pulling apart, spray whichever window pane you’re working on with the special window film application solution. Then it’s recommended to spray the outside of your film and the frosted window film side on the inside as you pull the 2 layers apart.

This keeps it from rolling back up into itself and helps it adhere to your window while you work the bubbles out. And yes, if you do it right, you’ll need a towel on the floor for this step.
To apply your now-wet film to the glass, try to use the factory edges when possible. Line up one corner and its 2 adjacent edges as best you can and press the film to the window. Allow the rest to fall into place. If you’re using a piece of privacy window film from the middle of your roll, leave excess on all 4 sides so you can trim it for clean lines.
Smooth Out Privacy Window Film
All you need is a credit card or driver’s license to smooth everything out. Start in the middle and drag your card up. Then drag it down. Finally work it from center to the right and then to the left. Some of the application solution will find its way out. That’s perfectly fine.

Continue to work out any bubbles that may be left behind. If any crumbs or gunk were left on your window pane after cleaning, you will see them bubbled up now. You can decide if it’s worth starting over to correct them at this point.😉
Trim Excess
Now you’ll want a fresh and sharp blade for the trimming part. You don’t want to rip your precious privacy at the very end!
I used my same card from the smoothing step to create a sharp corner against the metal frame around the pane. Press the card against the frame and cut the excess just along the card. Then move the card and cut that section, making sure the film is sitting flat against the glass at the crease. Once you get in the groove, you’ll be able to zip them around together and it’ll go quick!

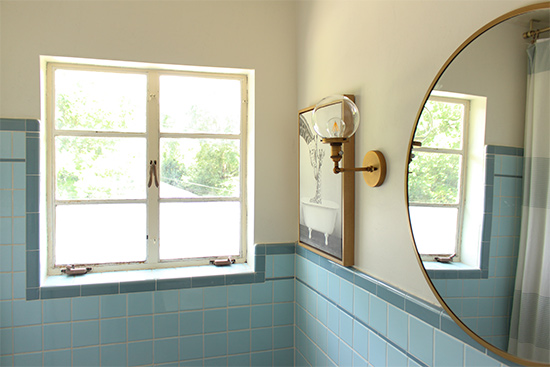
See the difference between the frosted and non-frosted panes on the bottom? It still lets sunlight stream in, but no more privacy issues! Rinse and repeat for as many windows as you need!

The sky was pretty bright so it looks like the top panes have frosted privacy window film too. But they don’t! We only needed it on the bottom panes for the necessary privacy, so that’s all I did. I love me some natural daylight, so I wanted as much as possible to flood in!
My sister-in-law is using this same stuff to frost glass panes on an old door for their laundry room! There are so many options for privacy or just hiding stuff with this privacy window film once you know how to use it!
Thanks for Checking In! ~Chelsea
*This post contains affiliate links. I will earn a small commission from your purchase without increasing the price for you!*


9 Comments
Molly
We just did this project!
We used the film to offer privacy without losing sunlight on the row of small windows in our garage door.
I had a small amount of film left over that I added to the glass doors that “hide” my recipe book collection … now they really are hidden out of sight in the cabinet.
I love this website, and I am excited to see Chelsea’s home projects as she updates her new home.
Leo Simone
How difficult is it to remove the screen, if one no longer requires it? Thanks!
Chelsea Lipford Wolf
I wouldn’t say it’s difficult to remove, but it was ‘messy’. It would require some goo-gone and a window scraper! ~Chelsea
Michelle Miller
Great idea!! Are you keeping the blue bathtub? I have a pink one and trying to decide if I should keep it or not?
Chelsea Lipford Wolf
No😬 It’s so big and so unattractive to me. I don’t normally like getting rid of things that aren’t ‘broken’ but I just can’t keep it. ~Chelsea
danielle henshaw
We are planning on doing this in our RV using the faux blinds look, so we still get privacy, but we can look between the “blinds” to see out when/if we need to.
But I have the same issue w/my main bathroom windows to the backyard & side-street, so I think I might do the faux blinds on the bottom half like you did also!!!
Thanks for the instructions.
Chelsea Lipford Wolf
Yes! It’s a balance between privacy and that natural light! ~Chelsea
Heidi Watts
I always look at your projects wether I am doing one of them or not. I appreciate the detailed instructions including the mentioning of pitfalls as well. Recently I used a frosted glass spray and that is much easier to remove if needed and the opaqueness is also under better control, fairly easy to apply and much less expensive!
Kristen Koehler
I love how you just added the privacy film to bottom panes of glass to let the sun in – great idea!